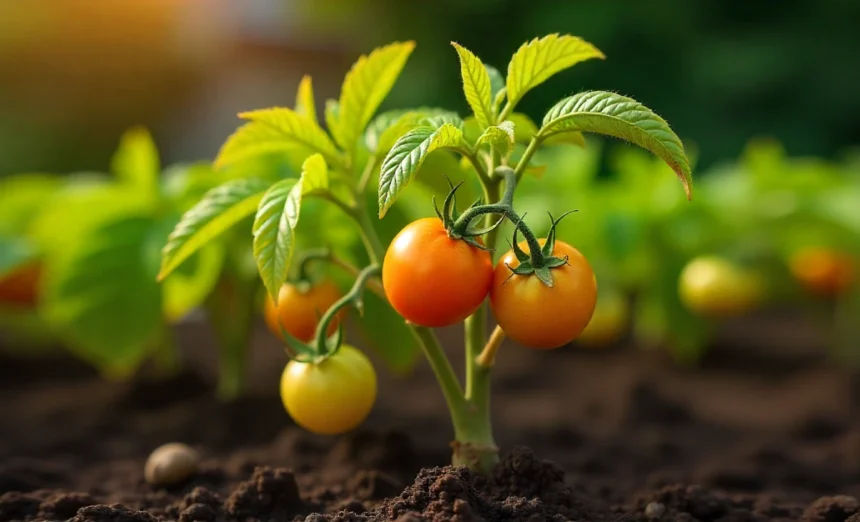
Nothing frustrates home gardeners more than watching their promising tomato plants suddenly droop and wilt. You’ve planted them with care, watered them regularly, and expected a bountiful harvest. Instead, you’re left staring at sad, droopy leaves and wondering what went wrong.
- Water Stress Issues
- Root Rot and Soil Drainage Problems
- Fusarium and Verticillium Wilt Diseases
- Heat Stress and Sun Damage
- Transplant Shock Recovery
- Pest Damage and Root Feeding Issues
- Nutrient Deficiency Effects
- Quick Diagnosis and Treatment Steps
- Prevention Strategies That Work
- When to Remove Affected Plants
- Recovery Timeline and Expectations
- Seasonal Considerations for Australian Growers
Tomato plant wilting happens for specific reasons, and the good news is that most causes are fixable once you know what to look for. Understanding these tomato plants’ wilting will help you diagnose the problem quickly and take the right action to save your crop.
This guide covers the seven most common reasons tomatoes wilt, how to identify each cause, and the exact steps to treat your plants effectively. By the end, you’ll know to keep your tomatoes healthy and productive all season long.
Water Stress Issues
Water problems cause most tomato wilting cases in Australian gardens. Your plants need consistent moisture levels to transport nutrients and maintain cell structure.
Underwatering shows up as wilting during the hottest part of the day, usually between 11 AM and 3 PM. The soil feels dry several centimetres down, and leaves may curl upward at the edges. Plants often recover overnight when temperatures drop, only to wilt again the next day.
Overwatering creates different symptoms. Leaves turn yellow before wilting, and the soil stays soggy even days after watering. You might notice a musty smell around the plant base, which indicates root problems developing.
Check soil moisture by pushing your finger 5-8 centimetres into the ground near the plant base. The soil should feel like a wrung-out sponge. Water deeply but less frequently to encourage strong root growth. In Australian summer conditions, established plants typically need watering every 2-3 days.
Root Rot and Soil Drainage Problems
Poor drainage kills tomato plants faster than drought. When soil stays waterlogged, roots can’t access oxygen and begin to rot within days.
Root rot symptoms include persistent wilting despite moist soil, yellowing leaves that progress from bottom to top, and black or brown roots instead of healthy white ones. The plant may also develop a foul odour at soil level.
Heavy clay soils common in parts of Melbourne, Adelaide, and Perth create perfect conditions for root rot. These soils drain slowly and compact easily, suffocating plant roots.
Improve drainage by adding organic matter like compost or aged manure to your soil. Create raised beds 20-30 centimetres high for problem areas. If planting in containers, ensure pots have multiple drainage holes and use a quality potting mix designed for vegetables.
Fusarium and Verticillium Wilt Diseases
These soil-borne fungal diseases attack tomato plants through their root systems. Once established, they spread through the plant’s vascular system, blocking water and nutrient transport.
Fusarium wilt typically affects one side of the plant first. You’ll see yellowing and wilting on one branch or side while the rest looks healthy. Cut stems show brown streaking inside the tissue. This disease thrives in warm conditions common across northern Australia.
Verticillium wilt causes similar symptoms but progresses more slowly. The leaves yellow from the bottom up, and you’ll see the same brown streaking in cut stems. This fungus prefers cooler conditions and affects plants in southern regions more often.
Both diseases persist in the soil for years. Prevention works better than treatment. Choose resistant tomato varieties marked with V or F on seed packets. Rotate crops annually and avoid planting tomatoes, potatoes, or eggplants in the same spot for at least three years.
Heat Stress and Sun Damage
Australian summers challenge even heat-tolerant tomato varieties. Extreme temperatures cause plants to wilt as a protective mechanism, even when soil moisture is adequate.
Heat stress wilting occurs when temperatures exceed 35°C for extended periods. Plants typically recover in cooler evening hours but show stress signs during peak heat. Leaves may curl inward or develop a grey-green colour.
Sunscald appears as white or yellow patches on fruit and leaves, particularly those facing west. These patches eventually turn brown and papery. Young transplants are especially vulnerable to sudden temperature changes.
Provide afternoon shade using shade cloth with 30-50% coverage during extreme heat events. Water early morning to ensure plants start the day well-hydrated. Mulch around plants with organic materials like straw or sugar cane mulch to keep soil temperatures stable.
Transplant Shock Recovery
Moving seedlings from protected environments to garden beds stresses plants significantly. Transplant shock causes temporary wilting while plants establish new root systems.
Newly transplanted tomatoes often wilt within hours of planting, even in perfect conditions. This happens because disturbed roots can’t immediately supply enough water to support the existing leaf mass. Symptoms usually peak 2-3 days after transplanting.
Minimize shock by hardening off seedlings gradually over 7-10 days before planting. Start with 1-2 hours of outdoor exposure and increase daily. Plant during cool, overcast conditions when possible.
Water transplants thoroughly but avoid flooding the root zone. Consider removing some lower leaves to reduce water demand while roots establish. Most healthy transplants recover within a week if conditions remain favourable.
Pest Damage and Root Feeding Issues
Several pests attack tomato roots and stems, causing wilting symptoms that mimic disease or water stress.
Root-knot nematodes create small galls on roots that disrupt water uptake. Plants wilt during hot weather despite adequate soil moisture. You’ll see these tiny, round swellings when you carefully dig up affected plants.
Cutworms sever stems at the soil level, causing sudden, complete wilting of healthy-looking plants. Check for these grubs in the soil around the plant base. They’re most active at night and hide in soil during the day.
Wireworms bore into stems and roots, creating entry points for disease organisms. Look for small, round holes in stems near the soil level.
Use yellow sticky traps to monitor adult pest populations. Apply beneficial nematodes to control soil-dwelling grubs naturally. Create physical barriers around young plants using cardboard collars or toilet roll tubes pushed 2-3 centimetres into the soil.

Nutrient Deficiency Effects
Severe nutrient imbalances cause wilting symptoms alongside other distinctive signs. While less common than water or disease issues, deficiencies weaken plants and make them susceptible to other problems.
Potassium deficiency causes leaf edges to brown and curl before wilting occurs. This nutrient helps regulate water movement within plants, so a shortage affects the plant’s ability to stay hydrated.
Magnesium deficiency shows as yellowing between leaf veins while the veins stay green. Severe cases lead to leaf drop and wilting as plants can’t photosynthesize effectively.
Nitrogen excess creates lush green growth that wilts easily because stems can’t support the heavy foliage mass. This commonly occurs when gardeners over-apply fertilisers containing nitrogen.
Test your soil every 2-3 years to identify nutrient imbalances before they cause problems. Use a balanced fertiliser designed for vegetables, and follow package directions carefully. Organic options like compost and aged manure release nutrients slowly and reduce the risk of over-fertilisation.
Quick Diagnosis and Treatment Steps
When you discover wilting tomatoes, act quickly to identify and address the cause. Early intervention saves most plants if the underlying issue isn’t too advanced.
Step 1: Check soil moisture at root depth. Dig down 8-10 centimetres near the plant base. Adjust watering if the soil is too dry or waterlogged.
Step 2: Examine the plant systematically. Look for pest damage, disease symptoms, or nutrient deficiency signs. Cut a stem to check for internal browning that indicates vascular wilt diseases.
Step 3: Consider recent changes. Have you transplanted recently, applied fertilisers, or experienced extreme weather? These factors help narrow down potential causes.
Step 4: Take corrective action based on your findings. Most water and nutrient issues respond quickly to proper care. Disease problems require more aggressive management, including plant removal in severe cases.
Step 5: Monitor progress daily. Healthy plants show improvement within 24-48 hours for water-related issues. Disease recovery takes longer but should show stabilisation within a week.
Prevention Strategies That Work
Preventing tomato plants from wilting saves time and ensures better harvests than treating problems after they occur. Focus on creating optimal growing conditions from the start.
Choose disease-resistant varieties suited to your climate zone. Cherry tomatoes like ‘Tommy Toe’ handle heat better than large varieties. Determinate types like ‘Roma’ work well in shorter growing seasons.
Prepare the soil properly before planting. Add compost to improve drainage and water retention. Test pH levels, aiming for 6.0-6.8 for optimal nutrient uptake.
Install drip irrigation or soaker hoses to maintain consistent soil moisture. These systems deliver water directly to root zones and reduce leaf wetness that encourages disease.
Apply organic mulch 5-8 centimetres thick around plants, keeping mulch 10 centimetres away from stems. This regulates soil temperature and moisture while suppressing weeds that compete for nutrients.
Practice crop rotation strictly. Keep detailed garden records, noting where you plant tomatoes each year. This simple step prevents soil-borne diseases from building up over time.
When to Remove Affected Plants
Sometimes the best solution is removing severely affected plants to protect healthy ones nearby. This difficult decision prevents disease spread and allows you to replant with better varieties.
Remove plants immediately if you confirm Fusarium or Verticillium wilt. These diseases spread through soil and water, infecting neighbouring plants rapidly. Bag affected plants and dispose in household waste, never compost them.
Plants showing advanced root rot rarely recover completely. If more than half the root system appears black or mushy, removal gives you better chances of success with replacement plants.
Severe pest infestations that don’t respond to treatment within two weeks warrant plant removal. Root-knot nematodes, in particular, build up quickly and affect future plantings in the same location.
Clean tools thoroughly with rubbing alcohol between plants to prevent spreading diseases. Replace removed plants with resistant varieties or consider alternative crops like capsicum or eggplant for the rest of the season.

Recovery Timeline and Expectations
Understanding realistic recovery timelines helps you manage expectations and make informed decisions about treatment versus replacement.
Water stress recovery: Properly watered plants bounce back within 12-24 hours. Leaves regain turgor pressure quickly once soil moisture returns to optimal levels.
Heat stress recovery: Plants typically recover overnight as temperatures drop. However, repeated stress weakens plants and reduces fruit production over time.
Transplant shock recovery: Expect 3-7 days for complete recovery. New growth indicates successful establishment. Plants that don’t show improvement after 10 days may have root damage.
Disease recovery: Viral and bacterial diseases rarely allow full recovery. Fungal issues may stabilise with treatment but seldom return to full vigour. Focus on preventing spread to healthy plants.
Nutrient deficiency recovery: Correcting deficiencies shows results in 7-14 days for mobile nutrients like nitrogen. Immobile nutrients like calcium take 3-4 weeks to show improvement in new growth.
Monitor treated plants daily during recovery periods. Take photos to track progress objectively. This documentation helps you identify successful treatments for future reference.
Seasonal Considerations for Australian Growers
Australian growing conditions vary dramatically across regions and seasons. Adjust your approach based on local climate patterns and seasonal challenges.
Summer management: Focus on heat protection and consistent watering. Northern regions need more aggressive shading, while southern areas benefit from reflective mulches that increase soil warmth.
Autumn planting: Second crops often face different challenges than spring plantings. Cooler soil temperatures slow root development, making plants more susceptible to overwatering issues.
Winter protection: Greenhouse or tunnel cultivation extends seasons but creates humidity issues. Ensure adequate ventilation to prevent fungal diseases in protected environments.
Spring preparation: Start with soil temperature monitoring. Cold soil promotes root rot even with perfect watering practices. Wait until the soil reaches 15°C consistently before transplanting.
Regional pest patterns also affect timing. Queensland growers face different challenges than Tasmanian gardeners. Connect with local gardening groups to learn area-specific solutions.
Understanding these tomato plants’ wilting causes empowers you to act quickly when problems arise. Most wilting issues are preventable with proper planning and cultural practices. Focus on creating optimal growing conditions rather than reacting to problems.
Start by improving your soil drainage and establishing consistent watering routines. Choose disease-resistant varieties suited to your local climate. Monitor plants regularly so you can catch issues early when treatment is most effective.
Remember that healthy, vigorous plants resist most problems naturally. Invest time in prevention strategies, and you’ll spend less time treating wilted plants. Your reward will be productive tomato plants that provide abundant harvests throughout the growing season.
What wilting symptoms are you seeing in your tomato plants? Share your experiences in the comments below to help other gardeners learn from your situation.